Wow…
I guess a few of you liked the idea of braiding your own reins! That’s exciting and I’m always thrilled when people want to create objects! I know how much of a thinking process it is… and can only see how it benefits you… I think everybody needs to learn to do some creating… I feel it’s like reading and expands your capabilities in various ways.
After teaching Girl Scouts for a long time, those kids exposed to such activities seemed to handle puzzles and problems better… those unexposed to crafts were easily frustrated, quit early, and had bad attitudes until they accomplished the goal… then they were on Cloud 9!
Whoops.
Sorry.
Back to the reins.
I try to control my lapses into Girl Scouting… sometimes it is hard to do!
Today was cold and windy and RAINY and I painted up at the Mills place… I’m almost to the decorating stage in that bedroom… then I’ll take a few pics!
But the request for a few more instructions on the reins seemed like a legitimate blog idea!
I buy my parachute cord from www.ubraidit.com I’ve always been happy with them! They also have books for sale for those of you who want more details!
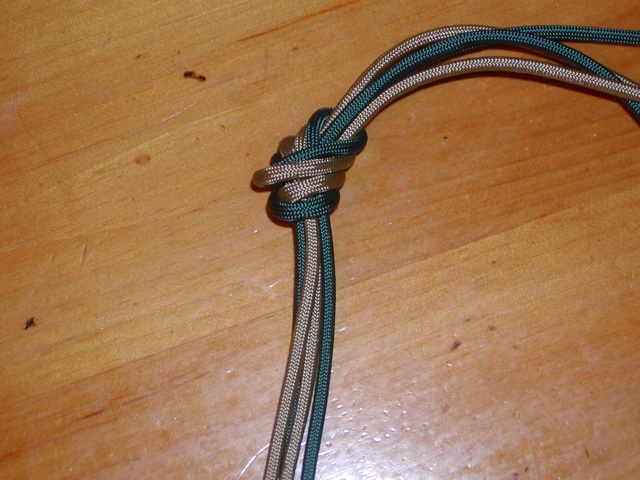
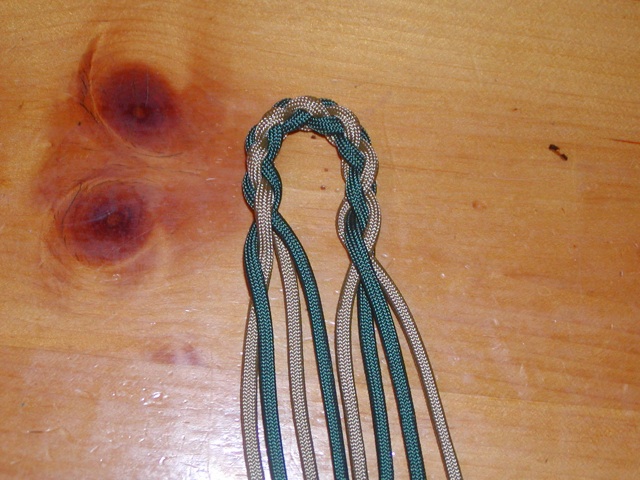
My reins are 4 strands of parachute cord. Each is 24′ long to start with. Fold them in half and find the center of the strands. Two inches to one side of it, tie off the strands. Use a clothespin or string or hemostat if you have one, or like I did here, just a simple overhand knot. Your cords should be two on top of two.
The top left green will go over the top right gold.
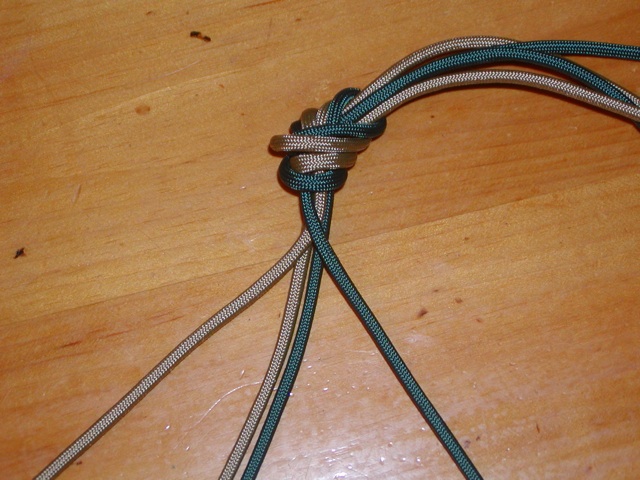
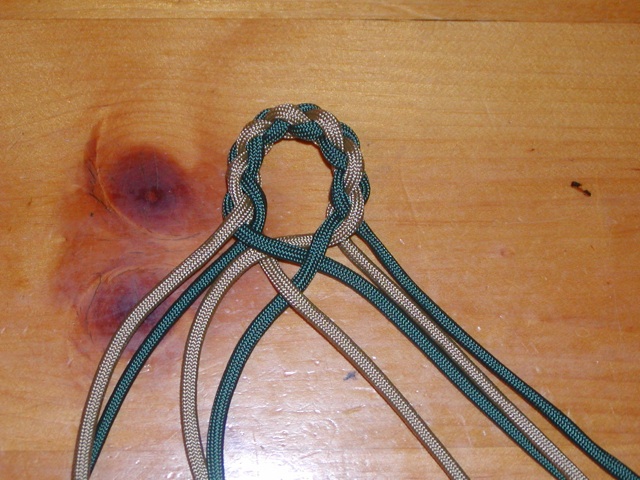
Bottom gold will go under bottom green and over top green.
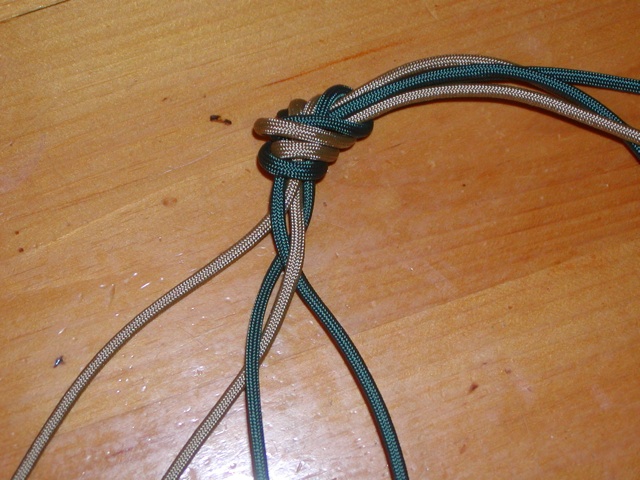
That bottom green looks like it was just hanging out there… but grab it and take it behind, under the bottom gold and over the top gold.
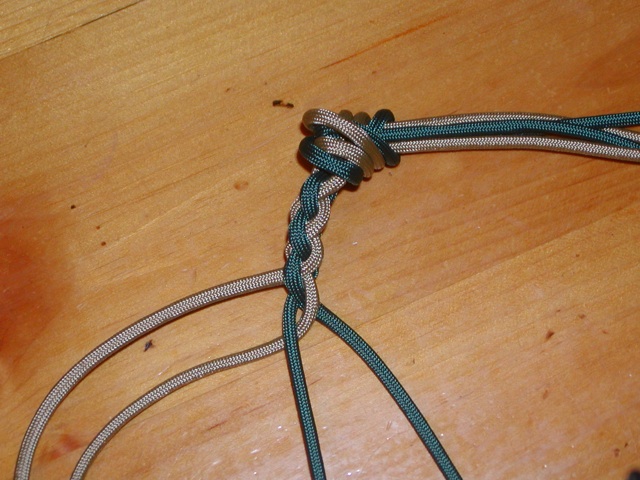
Continue braiding alternate sides… going behind, under and over. Here your left top gold would be the next cord to take behind, under green, over green. This four strand braid should be pulled tighter than what I show here. Pulling your cords tight will provide stiffness for your reins and less chance of them stretching and lengthening as they are used. My first pair of reins ended up being ten feet long after I rode with them for a while! I had to shorten them!
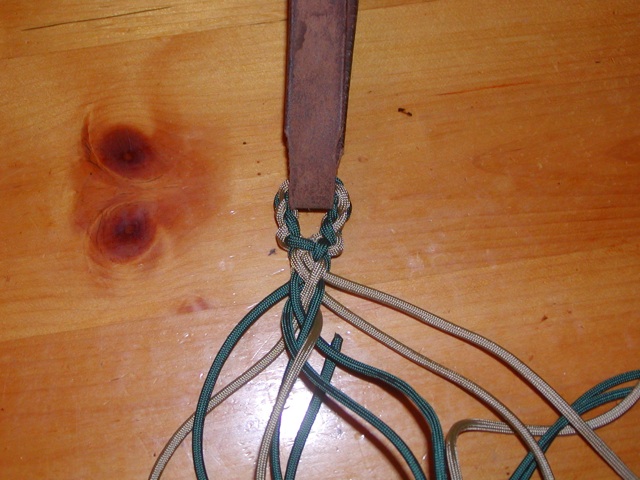
After you get three inches or so, release the held end and fold into position. Around here we like poppers on the ends of our reins… not so much for our horses as the slow cows we can urge on! Depending on the width of your poppers is how long this loop needs to be.
Now you’ll start the eight strand round braid like we went over before.
The two inner left cords from the left group will be alternated over the two inner cords from the right group.
Pull the cords very tight! Then continue your eight strand braid. Here the top right gold will go behind, under two, then over two. You will always have four strands on each side. Playing with the placement of the colors gives you different patterns.
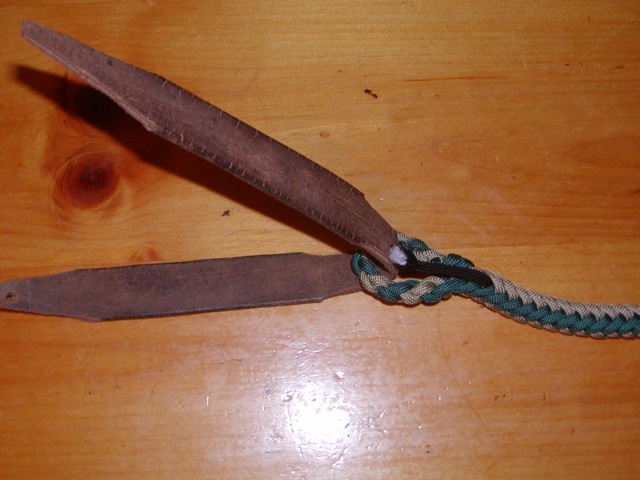
Before you get too far, make sure your popper will fit! If you need to, you may need to place it, THEN start your eight strand braid. A “keeper” will hold it in place… a simple running braid around the leather.
You also must braid around your core if you want one. I use one, first to add to the roundness of the braid… it tends towards squareness… plus it adds strength, for those horses that tend to break reins! On my rein, I cut a black cord a little over 7′ long and quickly start braiding around it… the tip will be cut off and disappear.
Notice how my colors are a different pattern than Brandon’s. My saddlepad is green, gold, and rust stripes, so I decided to stripe my reins as opposed to the “snake” pattern of Brandon’s.
Find me here!
